Are you thinking about trying wick dreads to add flair to your look? Wicks are blowing up in the locs community, and celebrities and influencers everywhere have been spotted rocking the iconic style. Don’t miss out your chance to hop on board this trend! In this article, we’ll explore everything you need to know about the history of wicks and how you can get the look. So, let’s dive right in!
What Are Wick Dreads?
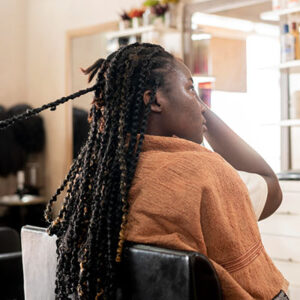
Wick dreads are truly one of the thickest dread hairstyles you can get! Each dread typically contains 4-10 wicks, with length varying from the wax-like structure of an everyday candle wick to those that hang straight down from the scalp. Enjoy the gorgeous look of natural dreads with fewer hassles and a fuller, thicker appearance!
Where Did Wick Dreads Originate?
The origin of Wick Dreads dates back to the early 17th century in the Caribbean islands of Barbados and Jamaica. The traditional dreadlocking style was used by slaves to keep their hair neat and tidy in a place where grooming practices weren’t readily available. The style of dreadlocks remained popular among Caribbean communities and eventually spread to other parts of the world. Today, Wick Dreads are still worn by those looking to make a bold statement with their hair.
It’s no wonder that wicks have become a staple in modern loc culture – after all, celebrities have an immense influence on what’s en vogue these days. From musical icons to fashion icons, the impact these stars have on popular trends is undeniable. As a result, the use of wicks in locs has become more accepted and embraced by the masses.
Wicks vs. Congos
Confusing wicks and congos is easy to do, but it’s important to distinguish between the two. Congos are when two or more dreadlocks merge into one at the roots, and can be any size. They typically don’t completely fuse, and rather have ends that poke out like tiny fingers. Wicks, however, are extremely thick locs with a smooth, rounded edge at the tip. Understanding the difference between the two can help you achieve the desired look for your dreadlocks.
How Long Does Your Hair Have to Be to Get Wicks?
Are you asking yourself if you have enough hair to install wicks? The truth is, you’ll need a minimum of 6 inches in order to start creating the ideal wicks. That length is usually enough for sections to stand a few inches higher than your scalp.Having enough hair to begin with makes it easy to cultivate your wicks and lowers your cost for installation. It is also possible to create wicks in longer lengths. Although it can take up to several hours to crochet sections or locs, the benefit of starting with long hair is that you can immediately have wicks that are the desired length.
Overall, having at least 6 inches of hair is necessary in order to create the perfect set of wicks. You can even have longer locks if you are patient enough to work through the entire process!
How to Start Wick Locs?
There are four main methods of starting wicks. Let’s explore these methods in detail to understand how they work.
1. The Crochet Wick Combine Method
The crochet wick method is the most popular way of creating wicks quickly and cost-effectively. With this method, you use a crochet needle to interweave the locs and create your wick instantly. Not only is it time-saving but it also allows you to get exactly the wick you want for any application, without having to wait for them to form over time.
Here is how you can turn your loose hair or traditional locs into wicks –
- Section your hair into sections using rubber bands at the roots of each section to get an idea of how many wicks you want. Some people prefer a few wicks, while others prefer more. This will give you a better idea of how many wicks you should use when it comes time to actually make your dreadlocks.
- Cultivate your wicks by using single, double, or triple-prong crochet needles to create your desired internal structure and external shape. With your hair held securely between your thumb, index, and middle fingers, begin crocheting near the roots of the hair or locs. Starting from the top, pull the crochet tool in and out of the section repeatedly, creating a rounded shape. As you move down the section, you’ll notice the hair fusing and tangling into a cylindrical shape. Continue moving down the section until you’ve created the entire wick. With just a few simple steps, you’ll have crafted the perfect wick.
2. Crochet Wick Extensions
If you’re looking for an easy way to get longer wicks, then crochet wick extensions are your solution! With these extensions, you can start your wick journey or easily extend your existing wicks. Plus, they provide a way to customize your wick length to fit your needs.
- Choose your wick extensions with confidence! With a variety of sizes and lengths to choose from, you can find the perfect wick extension to achieve your desired look. From small, medium, large, or jumbo wicks, you can easily find what you need to create the perfect style. Get ready to light up the room with your new wick extensions!
- Nourish and protect your scalp with a quality oil of your choice. Gently massage the oil into your scalp to ensure a thorough application. Allow the oil to penetrate your scalp for at least 15 minutes before rinsing off.
- Carefully section your hair and tie each section off securely with a rubber band at the roots. It’s important to make sure each section is the right size for your chosen hair extensions. If the sections are too small, the extensions won’t blend in with your natural hair and the new growth won’t match. Your parts should be significantly larger than the extensions. If you’re unsure of the size to make each section, it’s best to consult a loctician for advice.
- Secure your natural hair in the loose end of the wick extensions with a crochet needle. Gently move the needle in and out of the section where the wick extensions and the natural hair meet. This will help to create a secure bond and give your hair a round and voluminous look. Keep crocheting until the entire section is secure.
- Now you can repeat the last two steps for the remaining sections.
3. The Freeform Method
Growing wicks freeform is a great way to get gorgeous, natural-looking locks without the need for crocheting. Here’s how you do it:
- Allow your hair to grow and lock freely without manipulating it much. Just make sure to wash and oil your hair as needed.
- As your hair roots begin to fuse into one loc, separate them according to the thickness and number of wicks you’d like. With consistent maintenance and patience, you’ll eventually have your own unique and beautiful set of freeform wicks.
Keep in mind that freeform wicks will not always have a perfectly cylindrical shape like crocheted wicks. However, if you’re a fan of more natural-looking locks, freeform wicks will be a great option for you!
4. Rubberband Method
The Rubber Band Method is a quick and easy way to get locs on loose afro hair. Place rubber bands on the length of each section of hair. Leave them in for a minimum of three weeks, up to a month, then take off the bands and check to see if your hair is starting to lock on its own. If not, add the rubber bands and wait three to four more weeks. Once your hair is locked, you no longer need the bands — enjoy your locs!
Wick Care Tips
It is important to take note of following things while cultivating wicks.
- Make sure your wick sizes are all even for a neat and consistent appearance. This will ensure your candles look superb every time.
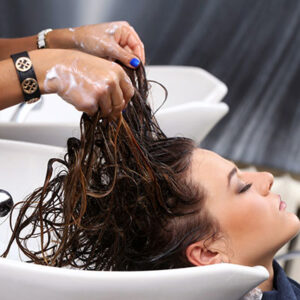
- Keep your wicks clean and healthy by washing them regularly with a clarifying shampoo. Ideally, you should be washing your wicks once or twice a month to ensure their hygiene and overall health. By doing this, you can prevent the build-up of dirt, sweat, and product residue, ensuring your wicks stay looking and feeling great!
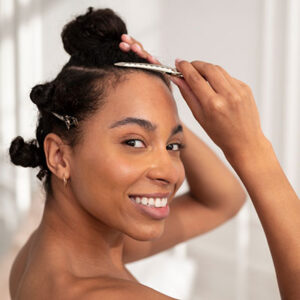
- Keep your scalp hydrated and nourished by moisturizing it frequently with a good quality oil or scalp serum. Don’t forget to cover your hair with a silk or satin bonnet or scarf at night to protect it from the elements and retain its moisture. Doing so will help you maintain a healthy, nourished scalp and hair.
- Once the wicks have been washed, make sure to dry them with a clean microfiber towel and then fully air dry or blow dry them to avoid mold and mildew growth. Doing this will help you keep your wicks clean and safe for use.
- Keep your wicks hydrated and smelling fresh with a daily spritz of rose water and a lightweight oil. Just spray a few drops on each wick daily and enjoy the long-lasting fragrance.
How Much Does It Cost to Wick Dreads?
When it comes to starting dreadlocks, the cost can range from $100 to $300, depending on your hair length and the salon you choose. Even after that initial cost, it’s important to factor in the cost for regular maintenance, such as retwisting or rewicking. Prices for these appointments can vary from store to store, but generally speaking, you can anticipate expenses between $50 and $250+. The best way to get the most accurate cost estimate for starting and maintaining your dreadlocks is to consult with a local stylist.
How Long Does It Take for Wick Dreads to Lock?
Getting dreadlocks can take anywhere from several months to several years, depending on your hair type and texture, what method you use, and what your desired outcome is. To get a good start, it’s recommended that you leave rubber bands in for 3-4 weeks. If, after that time, you find that your hair isn’t locking, leave them in for an extra 3-4 weeks before trying another method. With regular maintenance and mindful care, you’ll eventually achieve the dreadlocked look you want.
Can You Undo Wick Dreads?
Undoing wick dreads is a tedious and potentially damaging process, but it is possible. Typically, removal involves a combination of carefully combing, cutting, and/or pulling them out, which can take several hours depending on the length and thickness of the dreads. After removal, you may need to trim and condition your hair to repair any damage that may have occurred during the dreadlocking process. Taking the time to properly undo your wick dreads is essential for restoring your hair’s health and vigor.
Now that you know all the ins and outs of wicks, you can confidently craft beautiful ones in no time! With the right technique, your locs and loose hair will be adorned with perfect wicks in a matter of weeks. We hope this article was a great help to you, and we wish you lots of success in your wick-crafting journey!
Related Posts