To give your home a new and refreshing look, wall decor ideas play a major role. With DIY Wall decoration ideas, the dynamics of a room undergo a complete transformation. Wall decor has the power to give an otherwise mundane and boring space, a colourful look, as well as DIY wall craft ideas.
We bring for you one such DIY wall decoration that will not only help you spend your leisure time in enjoyment and craft help you indulge in a creative activity. Along with it, DIY Wall decoration also comes in the category of Best out of waste. Today’s time call for recycling and this is the ultimate way to recycle and make something new and innovative.
Let’s have a look at a proper step by step method for making Wall hanging that would help you to find out how to decorate your walls and add beauty to your home decor.
Material Required for Making This DIY Wall Decoration
- Colors
- Adhesive
- Cotton bud
- Pencil
- Scissors
- Cutter
- Quilling needle
- Colored paper
- Quilling strips
- Cardboard
- Decorative mirrors
- Glitter paper
DIY Wall Decoration – Step By Step Guide
Step 1
Take a cardboard and cut out a circle shaped disc out of it, having a measurement of 15 cms in diameter. Use this cut out as a template and make 2 more circular cut outs with this, so you get 3 discs out of it.
Step 2
Now take the circular discs and place them in the centre of the paper. See that there is some space on all four sides of the disc, when placed on the paper. Cut the extra paper off.
Step 3
Now take the sheets of paper and place the circular cardboard discs in the centre of the sheet and draw the outline of the circle onto the paper with a pencil.
Step 4
Make incisions on all sides of the paper from corners to the outline drawn with pencil now and place the disk in the centre of the paper
Step 5
Apply adhesive on the disc and bring the paper pieces on all sides to cover the disc.
Step 6
Repeat this same procedure for the other two discs too.
Step 7
Now take a cardboard, and cut out 35 cms and 4.5 cms broad strips, with the help of the cutter.
Step 8
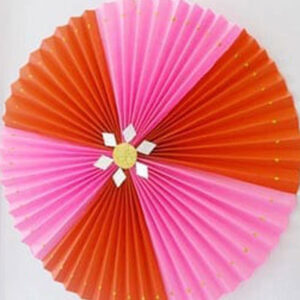
Now begin decorating one cardboard disc, with orange and blue color quilling tear drop coils and then, arrange them in the shape of a flower as shown and stick them on the cardboard with the help of an adhesive.
Make a tight coil of the quilling strips and paste it at the centre of the flower, with an adhesive.
Step 9
Take out some paint in a palette and mix with water. Begin to paint the ear buds with the color with the help of a brush. Paint them in red for the first disc.
Step 10
Begin pasting the ear buds starting from the tip of the flower petal and going half way out of the cardboard disc.
Step 11
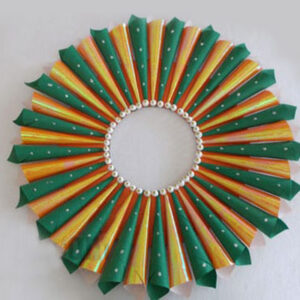
Arrange the pattern of the painted ear buds as per the shown pattern and repeat the same procedure for the other two cardboard discs with different color combinations in quilling flowers and painted ear buds as per your freewill.
Step 12
Take the long cardboard strips and paint them in black with the help of poster color and form a triangle by joining the ends of the strips with each other with the help of an adhesive.
Step 13
Paste the three cardboard discs on the three corners of the triangle.
Step 14
Take the glitter paper and cut a thin strip out of it. Cut small squares out of this strip and stick them in the spaces between the ear buds to give a decorative and shiny look.
Step15
Lastly, stick the decorative glasses on the black strips in a trendy pattern.
And there you have, it friends! A lovely DIY wall hanging that will create an everlasting impression on the minds of your friends and relatives who come and see this wall hanging as a piece of your home decor. And remember, it’s a best out of waste craft, is a secret!
So get your hands on the cardboards and ear buds and paints and decorative mirrors and get ready to explore the world of easy decoration ideas. And the next time people ask you for help on Interior decor and Easy decoration ideas, do tell them how to make a wall hanging for your home decor walls.
Did you try making this wall hanging? Share your amazing craft experiences with us!
Related Posts