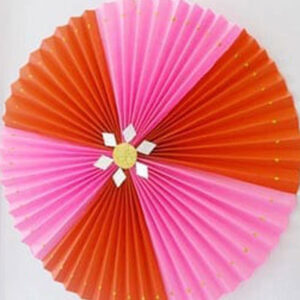
Christmas Decorations leaving you confused on how to make your own Christmas Door Wreath? Easy DIY Christmas Craft design that we are about to give you is an absolute super-sparkle design that will add beauty to your door that sets it apart from all. DIY Christmas Wreath is absolutely indispensable when it comes to Christmas Decoration ideas for the home.
From Holiday Wreaths to Elegant wreaths, from window Wreaths to ribbon wreaths, wreath using bow, mesh, paper and all sorts of designs and endless DIY Wreath Ideas are available and Christmas Wreath Decoration Ideas are many and have found a place in every household, but we are here to tell you step by step how to make an Easy DIY Christmas Craft from scratch.
Material Required For Making This Easy DIY Christmas Craft
- Glossy paper
- Colored paper
- Adhesive
- Pencil
- Scale
- Scissors
- Thermocol balls
- Cutter
- Craft wire
- Glitter
- Cardboard
Procedure of Making an Easy DIY Christmas Wreath
We will begin with preparing the cardboard. Take a cardboard of 25 cm in diameter and cut out a small circle measuring 12 cm in diameter, from the center of the circle. This will give you a concentric circle to make the base of the Christmas Wreath.
Let’s Begin Making the Wreath-
Step 1-
Fold a green colour A4 size sheet into half breadth wise that is 21 cm in breadth. Make 3 markings at a distance of 7 cm each.
Step 2-
Divide the paper into 3 equal sections breadth wise, by drawing lines with a scale and a pencil.
Step 3-
Cut the 3 sections into long strips and then re-cut them into 6 equal strips. One A4 size sheet, hence, will give you 6 equal strips of paper.
Step 4-
Repeat the above steps to get 6 equal sized papers of the glossy paper also.
Step 5-
Now hold the paper from one corner and roll it into a sharp and pointed cone, close and seal the cone by pasting the open fold and secure the cone.
Step 6-
Make a total of 42 such cones using the Green Coloured Paper and the Glossy paper.
Step 7-
Take another Orange coloured sheet and place the Cardboard cut out on top of it to draw the exact size of the circle. Cut out the exact measured orange paper. And cut the small circle in the centre with the help of a cutter to give a finished look.
Step 8-
Paste the Orange cut out paper to cover the cardboard, with the help of an adhesive. Cover the remaining portion of the cardboard as needed.
Step 9-
It’s time to start pasting the cones. First place the cones and understand the placement of the cones in alternating cones. Once finalized, go ahead and begin pasting the cones in alternating colours, on the orange circular cardboard.
Step 10-
Continue pasting the cones in alternating colours until you reach the end of the Cardboard.
Step 11-
In the end, take some thermocol balls in white colour and paste them on the edge of the inside circle, at the base of the cones.
Step 12-
Place a drop of golden glitter on the thermocol balls, to give them a decorative look.
Step 13-
Lastly, take a silver glitter tube and make a dotted pattern on the cones to add some sparkle.
Step 14-
Take a long craft wire and hang this wreath on the wall with the help of this wire.
And there you have it! Your very own DIY Handmade Christmas Door Wreath is ready! Your door will thank you for adding to its beauty with this lovely Easy DIY Christmas Craft. And why limit your home decoration till Christmas? Let the Wreath elongate happy times right up to the New Year!
Give this Wreath a definite try this Holiday Season and share your work with us!
Related Posts