Practicing easy yoga poses on a daily basis makes your body flexible and agile. With more and more people choosing to work in air conditioned offices and having little or no time to exercise, complaints like a backache are on the rise. While the reasons for lower back pain are many. A few noteworthy causes are:
- Sedentary lifestyle
- Long working hours
- Poor posture
- Unhealthy eating habits
If you do not have time to pick up the dumbbells or to exercise daily, yoga may be the answer to rid your pain. People who practice yoga for lower back pain are likely to rely less upon painkillers when compared to those who lead a sedentary lifestyle that entails little or no exercise.
To do this, there are few easy yoga poses for back pain relief that help in gently stretching out your lower back. They also provide a good workout to your and target your hamstrings and hips.
If you are unsure if yoga will actually help you are you are prone to acute pain that takes forever to dissipate, it may be a good idea to check with your general physician before trying out complex yoga exercises. Once you get the green light, try this five soothing easy yoga poses for lower back pain.
Start with giving no more than 5 minutes for each exercise. Gradually increase the time you spend on each exercise. Even doctors suggest yoga exercises for lower back pain, that range from mild to acute pain. These exercises are proven to help alleviate symptoms associated with excruciating pain, effectively.
Easy Yoga Poses To Treat Lower Back Pain
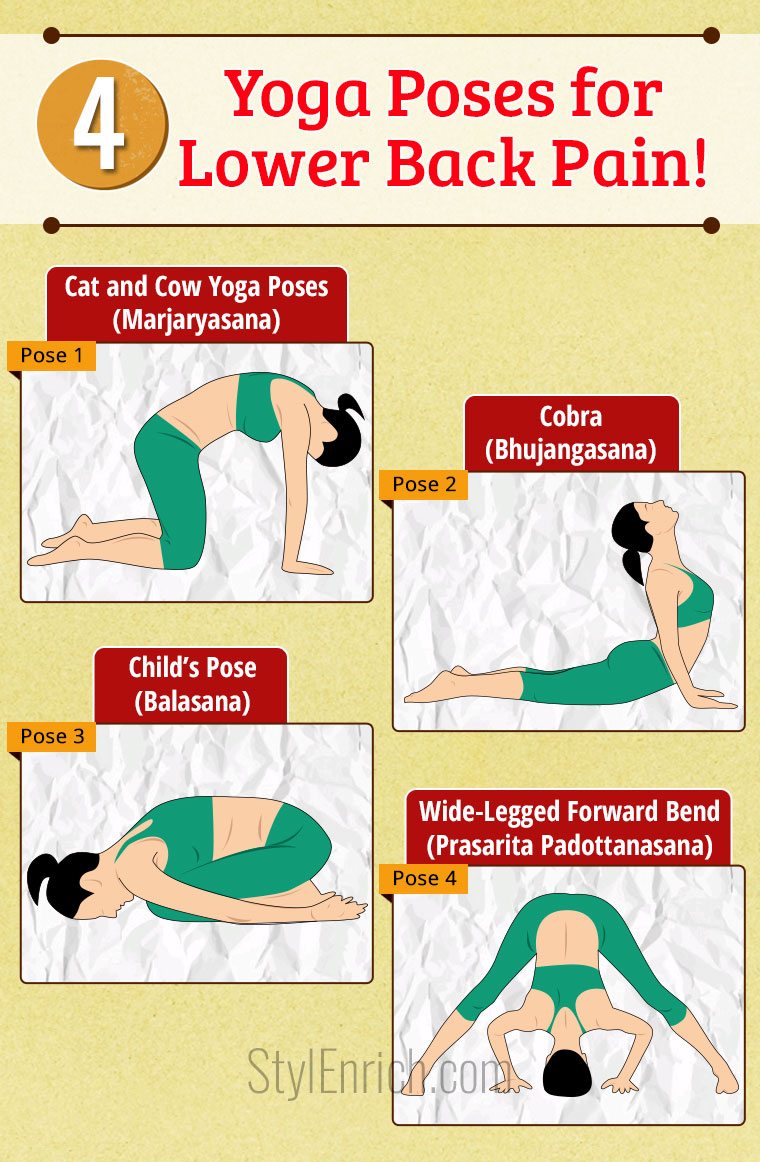
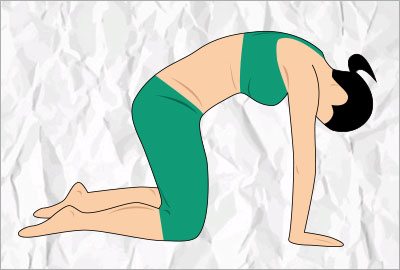
1. Cat and Cow Pose (Marjaryasana)
This is an exercise that is practiced by many saints and monks, the Cat and Cow stretch is the great warm-up exercise for your back before you hit the gym or the pool. This is hands down one of the best yoga postures for lower back pain.
- Begin on your hands and knees so that your back is fully flat and your abs are well engaged. Now, begin to inhale, you will feel your belly softening. Arch your back while gently lifting both your head as well as the tailbone. This phase of the yoga exercise is referred to as COW.
- It is now time to exhale. While you begin to exhale, you should also try and round your spine in such a manner that it is aligned with the ceiling above. This is tricky, but with a few tries, you will soon master it. Now, gently begin pulling your abs inwards towards your spine, while also tucking your tailbone in and drawing your chin into your chest. This phase is known as CAT.
- Once you have mastered the two phases of the exercise. Try to gracefully move between the two poses.
Don’t miss to read the Benefits of Yoga for Healthy Body and Mind…
2. Cobra (Bhujangasana) for Relieving Lower Back Pain
This back bending pose that even doctors recommend are said to help in increasing the mobility and flexibility of your spine while also targeting your chest and shoulders. This is one of the easy yoga poses for lower back pain. This pose reduces stiffness and improved mobility of your back.
- Lie on your belly keeping both your legs close together. Now bring both your arms in front of you and beside your shoulders.
- Begin inhaling. As you inhale begin to raise your head above the ground up to your naval region. You back will now be arched.
- Hold this position for a minute or two. Inhale and exhale deeply as you hold your stance.
- Get back to your original position while deeply exhaling.
- Repeat this a half dozen times.
3. Child’s Pose (Balasana)
Wide Child’s Pose is a counterpose to the Cobra pose. Here you go inwards contrary to the cobra pose. This is one of the many easy yoga poses for lower back pain. This is one of the restful poses that often is practiced at the beginning and end of a series of yoga exercises.
- Get comfortable on the floor. Now move into a pose where you sit over your legs. Your hips should rest on your folded legs and heels. Relax and let your hands lie on your thighs.
- Now gently shift your body weight forward and place your hands on the floor in front of you.
- As you inhale, bring your forehead to touch the floor or mat. Do not let your back get stiff. Allow your torso to gently rest on your thighs and leave your back loose.
- Now, move your arms behind you to rest on your heels, while facing upwards.
This pose symbolizes a salutation to mother earth! This relaxing lower-back release also targets the oh-so-tight hips. You can also practice this exercise while in the shower, as hot water will help in soothing your back, sooner than you can think!
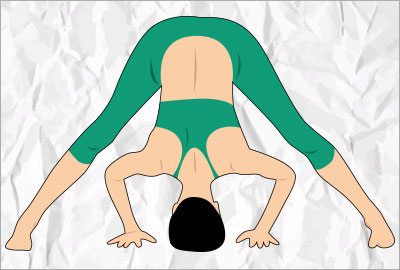
4. Wide-Legged Forward Bend (Prasarita Padottanasana)
Apart from stretching your lower back, the Wide-Legged Forward Bend also is a great workout for both your shoulders as well as the hamstrings. This is yet another tricky pose and you may need to try it under the supervision of a yoga expert.
- Keep your feet about 4 to 5 feet apart. Next, bend your body forwards and make your head touch the floor. You will need to use your hands to support your body, as you move your head downwards. Your elbows should bend towards the back wall.
- Next, press into your feet while lengthening both your legs and pushing your hips towards the ceiling.
- You will feel your spine stretch as you push your head down and lift your hips up.
- Breathe and hold for five deep breaths.
- Release and repeat
While yoga exercises may not be ideal for those who suffer from chronic pain, it helps immensely in cases of occasional soreness. Most exercises like cycling may not help strengthen your back. However, these easy yoga poses for lower back pain help in stretching and strengthening the muscles in your back, and thus your back return to proper alignment.









I don’t know the correct name for this movement but the instructor of the yoga class I used to take always had us come out of the wide legged pose the follow way. We would come halfway up with our hands placed on our lower back for support then with our truck parallel to the floor we would lean forward like someone leaning forward ro look over a roof top.
I found out how important this manuver was for me when I didn’t do it one time when I was working out on my own. I hope the was helpful and that I was able to successfully describe the move
I am going to start these exercises to tonight
Thank you for the tips
4.5