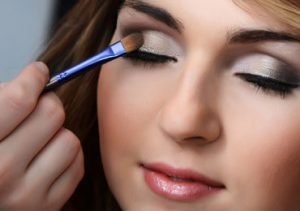
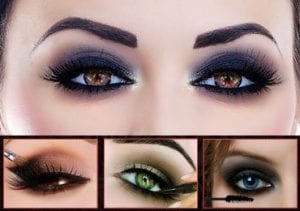
Make-up, as they say, is every girl’s best friend! It’s almost become a second skin or a second nature to wear make-up almost daily. While almost all of us know some tips and tricks related to the application of make-up, we are sometimes clueless as to how to accentuate the weak features of our face. A lot of us have hooded eyes and hence, we cannot use the traditional way of applying the eye makeup. The shape of hooded eyes is quite different from the shape of almond eyes.
Though it is not the most flattering shape of the eye, there is a lot you can do to accentuate the hooded eyes. In this article, we will basically discuss the tips and tricks on applying eye makeup for hooded eyes.

What are Hooded Eyes?
We first need to understand the actual shape of the hooded eyes in order to learn the makeup procedure for such kind of eyes. People with hooded eyes tend to have a very small surface area between the eyebrow and the lashes. Their eyelids are also smaller as compared to people who have round eyes. Also, the upper portion of the eyelids sometimes covers the eyes. This combination is defined as hooded eyes.
There are various ways in which you can highlight hooded eyes and make it look like a stunner. Let us discuss them in detail.
1. Eyebrows

Eyebrows are, more often than not, the most ignored part of the whole make-up procedure but the importance of well-defined eyebrows cannot be overemphasized. It can give you an instant facelift and make you look more confident. More so in the case of people with hooded eyes. Since people with hooded eyes have less space between their eyebrows and the lashes, enhancing the eyebrow can really make a difference in this case. The application technique is quite simple. You first need to tame your eyebrows using a clear mascara. Once this is done, you need to shape the eyebrows using the color which is closest to the natural color of your brows. You can again use a clear mascara to set the brows if you feel like. You may skip this step as well. This is the most important trick for people with hooded eyes.
2. Eye-primer

The biggest problem that people with hooded eyes suffer from is the smudging of makeup. Hence, eye primer is a complete savior for such kind of eyes. It helps your eye makeup stay longer. It also enhances the pigment of the eyeshadows that you apply.
3. The Procedure of Application

Since the eye makeup tends to smudge a lot in case of hooded eyes, it is best to apply your eye makeup with your eyes open. This will prevent the eyelids to blink and thus the make-up will not smudge. Also, since the crease line is not visible in case of people with hooded eyes, applying eyeshadow with your eyes open will only enhance the eyes.
4. Marking the Crease

Since the crease line is not quite evident in case of hooded eyes, you yourself need to mark a crease line in order to proceed with the application of the eyeshadow. This way, even if your eye is open, the color will not be smudged or lost.
5. Eyeshadow Below the Water Line

Hooded eyes tend to give the face a dull look. It often gets lost in the other makeup highlighters. In order to highlight the eyes, you need to apply eyeshadow below the lower waterline of your eyes. It should ideally be a straight line heading towards the end of your eyebrows. This will instantly lift up the face and highlight your eyes.
6. Use Matte Eyeshadow Colours

Since the natural crease line is missing in case of hooded eyes, it is best to use matte shades. Shimmery shades tend to fall out a lot and are a bit tough to blend. To avoid a confusing and an all-over-the-place look, it is recommended to use matte shades as the base. You may go ahead and add a bit of shimmer towards the end to highlight the center of the eye.
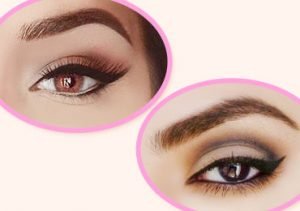
7. Always Use Dark Eyeliner

It is a great idea to use a dark line for people who have hooded eyes. This is because the eyeliner will give a shape and dimension to the upper part of the upper water line. Also, make sure you extend the liner a bit so that it becomes a bit more defined and sleek. Avoid using a lot of colorful eyeliners. It is best to stick to shades like black, brown, dark grey and other dark neutral colors.
8. Use Clear Mascara

Using clear mascara can go a long way in lifting up the eyes. Mascara can add a lot of volume to your lashes and it almost looks like you are wearing fake lashes. A clear mascara also provides some strength to the lashes. This makes the application of the colorful mascara quite easy and long-lasting.
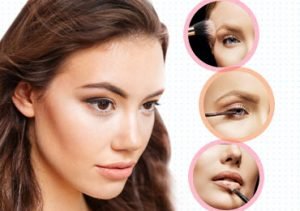
How to Do a “Cat Eye” with Winged Liner for People with Hooded Eyes!
This is probably the biggest struggle for people with hooded eyes. People generally do not get the Cat eyes right. Here’s a step by step procedure on how to go about it.
Step 1-
Start with the eyeliner. Do a simple line above the upper waterline towards the end of the lashes. Here’s a trick on how to get it perfect: Always look in the mirror while applying the liner, Always flick with your eye open and stop at the fold so that you can continue the wing from there.

Step 2-
The next step is to gently pull the eyes upward and outward. Hold on to the end of the eyes, just below the end of the eyebrows and pull outward and upward.
Step 3-
You need to now hold the position of step 2 and take the eyeliner forward from the fold that you had stopped at on step 1. Elongate the wing as per your choice. I generally prefer a medium sized wing.

Step 4-
Trace over with liquid liner: Use a liquid eyeliner and trace it over the winged eyeliner that you just created.

That’s it and here’s your perfect winged liner!
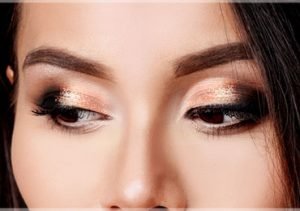
How to Do “Smokey Eyes” Makeup for Hooded Eyes?
The upward cut crease is the best method to achieve that perfect Smokey look for people with hooded eyes.
Follow these steps:
Step 1-
Take a dark liner and gently form a crease line.

Step 2-
Smudge, smudge, and smudge! The next step is to smudge that liner but only in upward direction. Be careful to not take it too higher up to the brows. That will spoil the look completely.

Step 3-
Take a matte base color of your choice and apply it gently all over the outer corner of the lid. You can take a matte base color as per the palette that you want. It can be bronze, slightly burgundy or brownish as per the look you want to achieve.

Step 4-
Pigment the base and smudge as much as possible.

Step 5-
Take the highlighter shade or the shimmery shade that matches your palette and pat it on to your central part of the eyelid. Make sure to be extremely neat with the application as there should be no fall out otherwise it will end up looking messy.

Step 6-
Highlight the brow bones. This is yet another way of highlighting the high points of your face. Highlighting takes the attention of the viewer towards the eyes hence enhancing them.

Step 7-
Highlight the inner corner of both your eyes for that added bling.

Simple Tips
1. Experiment with Colours
Since the surface area of application of eyeshadow is a bit less if you have hooded eyes, go ahead and experiment with the dash of colors. It will never look over the top!
2. Use Waterproof Mascara
Since mascara is one of the major areas where your makeup is focused, make sure you use waterproof mascara so that the mascara stays in place even when you go out there and party!!
3. Use the Colour Grees
As strange as it may sound, green is the color for you girl! But, only use it in the inner corner of your eyes and the inner corner of your lower water line.
4.Curl Your Lashes
Make sure you curl your lashes so that the eyes have an illusion of looking wider than they actually are!
Just follow these simple tips and tricks and you are good to go!! I hope you will try out some of these tips. Until then, stay stylish and slay it!
Read Next – Smokey Eyes Makeup: Step by Step Tutorial For Beginners!
Related Posts